10 Patio Door Installation Tips for Global Buyers
Buying a patio door across borders involves more than choosing glass, color, and opening direction. Successful patio door installation depends on climate, wall construction, drainage, hardware, and local building requirements. A coastal home may need stronger wind resistance. A cold region may demand a lower U-factor. Humid climates require careful sill flashing and visible drainage paths.
The stakes are measurable. The United Nations Environment Programme and GlobalABC reported that buildings consumed about 34% of global energy and produced approximately 37% of energy-related emissions. The U.S. Department of Energy also explains that windows and doors can account for significant household heating and cooling losses. These figures make installation quality an energy issue, not merely a finishing detail.
Tom Silva, veteran contractor and This Old House expert, offers a practical warning: “A door is only as good as its installation.” That sentence remains difficult to dispute. A premium frame can still leak if the opening is out of square. A beautiful threshold can still collect water when the sill slopes inward.
This guide examines patio door installation from a global buyer’s perspective. It covers rough-opening measurements, compatible fasteners, flashing, insulation, glass performance, and final operation checks. NFRC labeling and local certification should also be reviewed before purchase. Standards differ.
A perfect checklist does not exist. Site conditions often expose assumptions. Still, careful preparation reduces expensive surprises, drafts, water stains, and difficult warranty disputes.
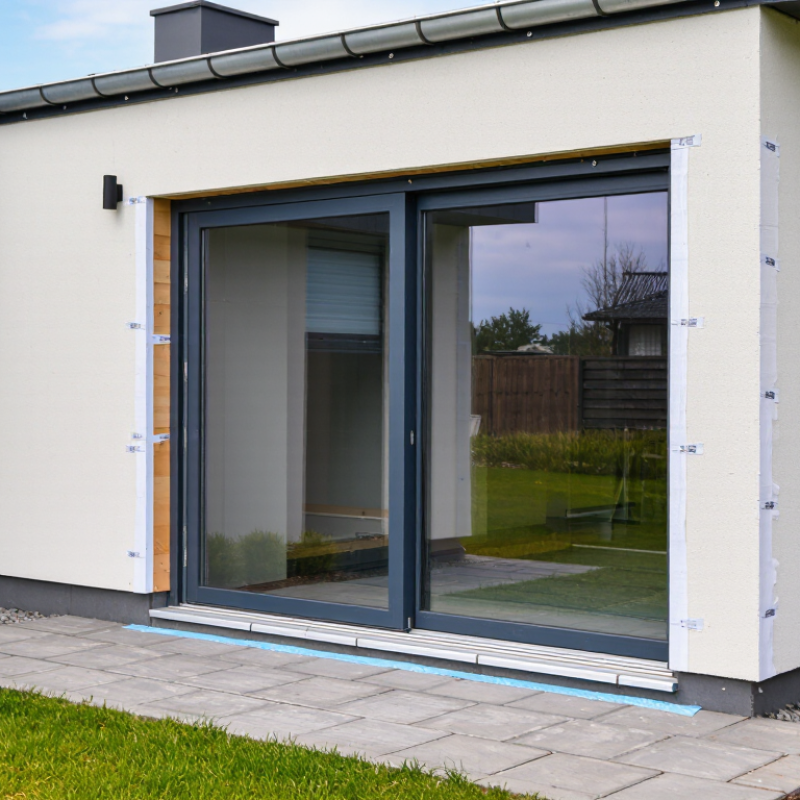
Assessing Climate, Building Codes, and Patio Door Requirements
For global buyers, patio door installation starts with the site, not the product image. Coastal homes face salt air, strong wind, and driving rain. Cold regions need low air leakage and frames that tolerate repeated freezing. Hot climates demand solar control, shaded openings, and drainage for sudden storms. I once underestimated afternoon heat on a west-facing opening. The room became uncomfortable despite good glass. That mistake changed my assessment process.
Tip: Record the opening width, height, wall thickness, sill level, and exterior exposure. Photograph the threshold after rain. Check whether water pools near the track. Building codes may require safety glazing, minimum egress dimensions, wind-load resistance, thermal performance, or impact protection. Requirements vary by municipality and building type. Ask the local authority or a licensed professional for current rules before ordering. Product drawings should match the approved rough opening, not a hopeful measurement.
Tip: Confirm the door’s operation within daily life. Will furniture block the swing? Can someone reach the lock during an emergency? Test screen clearance and drainage paths. Request written installation details, compatible sealants, and maintenance instructions. Keep records of approvals and site measurements. Reliable installation depends on the surrounding wall, too. An excellent door can still leak when flashing is incomplete. I would also allow extra time for inspections. Schedules often look precise until weather or masonry changes them. Leave room for correction.
Patio Door Installation: Climate-Based Design Priorities
Heating and cooling degree days indicate how strongly a location is affected by outdoor temperatures. Higher HDD values generally increase the importance of low U-factor glazing and airtight installation, while higher CDD values increase the value of solar-control glass, shading, and careful weather sealing.
Approximate 1991–2020 climate-normal degree-day values using a 18°C base temperature. Actual values vary by station, elevation, and calculation method. Verify local building codes, wind loads, water-management details, and energy requirements before installation.
Comparing Materials, Glass Options, Hardware, and Energy Performance
Global patio door buyers should compare material, glass, hardware, and energy performance together. A low-cost frame may look attractive, but weak thermal breaks can create cold interior edges. Aluminum offers strength and slim sightlines, while vinyl and fiberglass usually reduce heat transfer. Wood feels warm and traditional, yet it needs regular sealing in wet climates.
Glass selection depends on local weather and room orientation. Double glazing suits moderate climates, while triple glazing helps in colder regions. Low-emissivity coatings can reduce heat loss, but solar control may matter more on west-facing openings. Check the U-value and solar heat gain coefficient, not only the marketing label. Tempered glass improves impact safety. Laminated glass can also reduce noise and hold together after breakage. Confirm these requirements with local building codes.
Hardware deserves hands-on inspection. Rollers should move smoothly without scraping, and multipoint locks should engage evenly along the frame. Stainless or corrosion-resistant components are safer near coastal air. The sill needs visible drainage paths and a proper slope. Installation errors are common. A perfectly rated door can still leak if the opening is out of square. Measure the rough opening twice, leave the specified clearance, and seal the perimeter with compatible materials. I once underestimated afternoon sun, and the room became uncomfortable despite excellent insulation. Energy performance is never just a glass decision.
Preparing the Site and Installing the Patio Door Step by Step
Preparing the site correctly makes patio door installation safer and more predictable. Measure the opening at three points for width and height. Measure twice. Check the wall for plumb, level, and square conditions. Remove old sealant, damaged shims, and loose masonry. Keep it dry. Water intrusion often begins around neglected sill areas, not the glass.
Place the sill pan with a slight outward drainage path. Follow the local building code and the door manufacturer’s approved fixing schedule. Global buyers should confirm wind, rain, thermal, and accessibility requirements for their climate.
The International Energy Agency reports that buildings use about 30% of global final energy. The U.S. Department of Energy also estimates that windows and doors can account for 25–30% of residential heating and cooling energy use.
A poor installation can waste the performance promised by the product.
Set the frame onto solid, level shims, then fasten through the specified points. Do not force a bowed frame into alignment. Leave the required expansion space around the perimeter. Insulate that gap carefully, but avoid overfilling, which can distort the frame.
Install the panels, adjust the rollers, and test the lock several times. Spray water across the exterior joints and inspect the interior sill. Small gaps matter. A perfect-looking frame can still leak. Recheck operation after temperature changes; this step is often skipped, and that is where installation assumptions become expensive.
Testing, Sealing, and Maintaining the Finished Installation
After installation, test the patio door before applying interior trim. Open and close each panel slowly. It should move without scraping, shaking, or sudden resistance. Check the lock at several points along the frame. A lock that feels tight may indicate uneven alignment, not security.
Use a level to inspect both jambs and the head. Measure the diagonal corners; noticeably different readings suggest a twisted frame. Spray water gently over the exterior joints, especially near the sill and lower corners. Do not use high pressure. Watch from indoors for damp marks or moving air. Small gaps can become serious problems in coastal, rainy, or freezing climates. Sealant must bond to clean, dry surfaces, with enough flexibility for seasonal movement. I have seen neat-looking beads fail because installers sealed over dust. It is an easy mistake.
Maintenance should match the local environment. Remove grit from the track with a soft brush, then wipe it with a dry cloth. Use only a compatible lubricant on rollers and hardware. Check drainage openings every few months, particularly after storms or dusty weather. Inspect sealant for cracks, shrinkage, or separation from the frame. Replace damaged weatherstripping before drafts become visible. Do not force a stiff panel; forcing it can damage the rollers. Even careful inspections miss things sometimes. Record test dates and photographs, since small changes are easier to identify over time.